cvm_writer 3D
In this tutorial, we will use the cvm_writer tool to convert the Cascadia_ANT+RF_Delph2018 raw 3D data (latitude, longitude, and depth coordinates) into CVM model files. Specifically, we aim to convert a CSV model to netCDF and GeoCSV formats. To achieve this, we need:
The model data in CSV format
A global parameter file
A parameter file for the variables
The parameter files are based on the templates from the template directory.
Step 1: Navigate to the Model Directory
Change your directory to the model directory:
cd sample-files/Cascadia-ANT+RF-Delph2018Step 2: Prepare the Data File
The Cascadia_ANT+RF_Delph2018.txt.gz file is the raw data file for the model. Unzip it and copy it to a file for testing (e.g., Cascadia-ANT+RF_data.txt). This will be our model’s data file. All model data files need to have a header as their first line that identifies the columns in the file using the same delimiter between column names as used for the data. Place the following header as the first line in Cascadia-ANT+RF_data.txt:
longitude latitude depth vs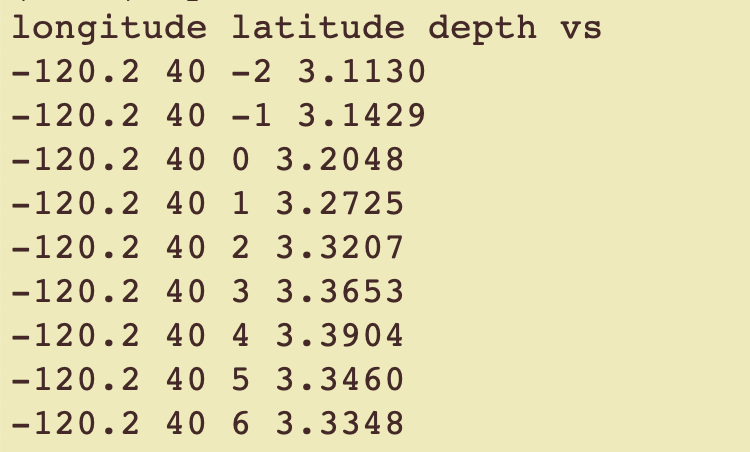
Data file with the required header added. The delimiter between column names should be the same as used for the data.
Step 3: Prepare the Metadata File
Now, we need model metadata files. The metadata files contain the model metadata as text. Templates for the metadata files are available under the template folder. Two metadata files are needed: one global based on template/global_metadata_template.txt and another for variables based on template/variables_metadata_template.txt.
For this tutorial, you do not need to copy templates. We already have the necessary metadata file for the global attributes as Cascadia-ANT+RF_global_meta.txt and for variables as Cascadia-ANT+RF_meta.txt placed under this directory.
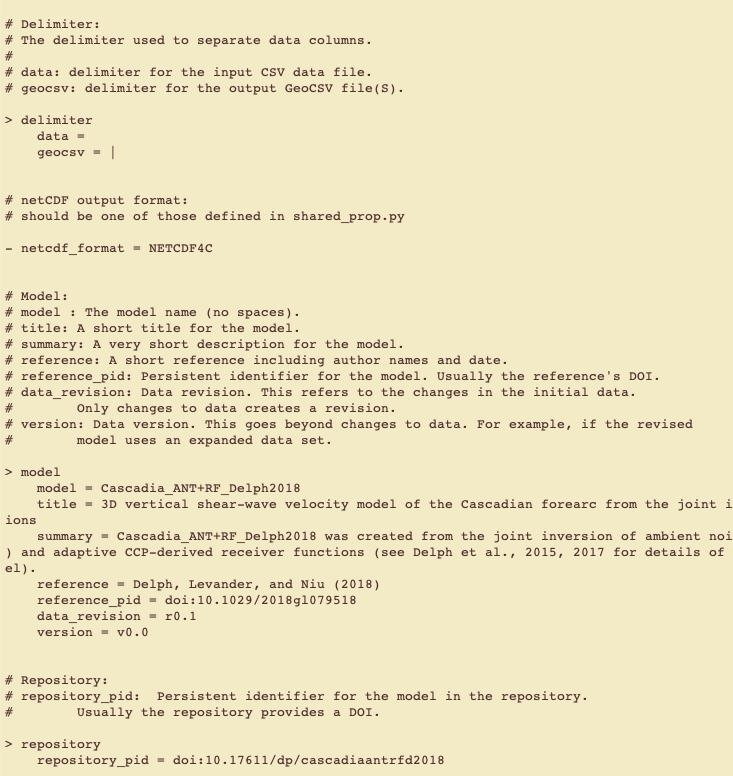
A view of the global metadata file.
For detailed instructions on how to create these parameter files, see the Parameter File Structure guide.
Step 4: (Optional) Convert Metadata to GeoCSV and JSON
This step is optional. Its purpose is to familiarize you with various metadata formats. During regular model format conversion, you can skip this step and go directly to Step 5.
Convert the metadata to GeoCSV by running the cvm_writer.py tool:
python ../../src/cvm_writer.py -m Cascadia-ANT+RF_meta.txt -g Cascadia-ANT+RF_global_meta.txt -o Cascadia-ANT+RF-test -t metadata-m Cascadia-ANT+RF_meta.txttellscvm_writerthat the variables metadata file isCascadia-ANT+RF_meta.txt.-g Cascadia-ANT+RF_global_meta.txttellscvm_writerthat the global metadata file isCascadia-ANT+RF_global_meta.txt.-o Cascadia-ANT+RF-testspecifies the output filename prefix. For metadata, a postfix of_metadatawill be added to the filename.-t metadatatells the code that we only want the metadata files.
After running this command, you should see two new files in your model directory:
Cascadia-ANT+RF-test_metadata.csv— the metadata file in GeoCSV formatCascadia-ANT+RF-test_metadata.json— the metadata file in JSON format
Step 5: Create the Model File
Now, create the model file by running:
python ../../src/cvm_writer.py -m Cascadia-ANT+RF_meta.txt -g Cascadia-ANT+RF_global_meta.txt -o Cascadia-ANT+RF-test -d Cascadia-ANT+RF_data.txt -t netcdf-m Cascadia-ANT+RF_meta.txttellscvm_writerthat the variables metadata file isCascadia-ANT+RF_meta.txt.-o Cascadia-ANT+RF-testis the name of the output file (no file extension should be included).-g Cascadia-ANT+RF_global_meta.txttellscvm_writerthat the global metadata file isCascadia-ANT+RF_global_meta.txt.-d Cascadia-ANT+RF_data.txttells the code where it can find the model data.-t netcdfspecifies that we want the output to be in netCDF format.
After running this command, you should see a new file Cascadia-ANT+RF-test.nc, which is our model in netCDF.
Please note that you could also use -t geocsv for GeoCSV output or combine them with -t metadata,netcdf,geocsv to get all the outputs.
Step 6: (Optional) Examine the Output Files
If you created GeoCSV or JSON metadata files in step 4 above, look at these files to familiarize yourself with these formats.
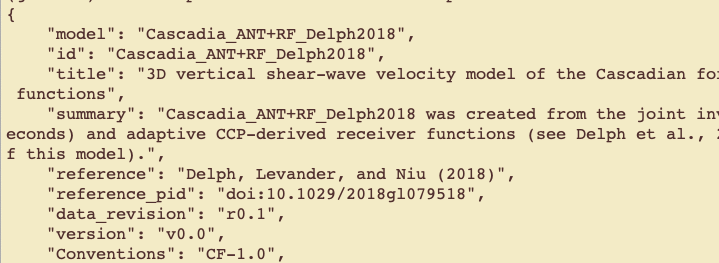
Sample content of the JSON metadata file.
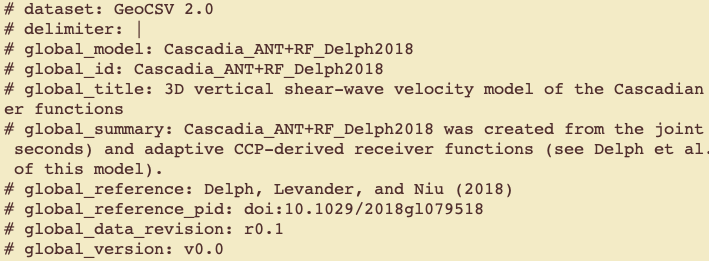
Sample content of the CSV metadata file.
Step 7: Examine the netCDF File Content
To examine the netCDF file content, use the netcdf_summary_info.py script to summarize the created netCDF file. Upon execution, the script will prompt you for the name of the netCDF file to summarize. It will then read the netCDF file and provide a summary of the metadata and data contained in the file. Successful execution of this step indicates that the general structure of the netCDF file is correct and allows you to examine the data and metadata contained in the file to verify.
Run the following command:
python ../../src/net_summary_info.py
Prompt for netCDF file name.
After providing the file name, you will see a summary of the netCDF file content.
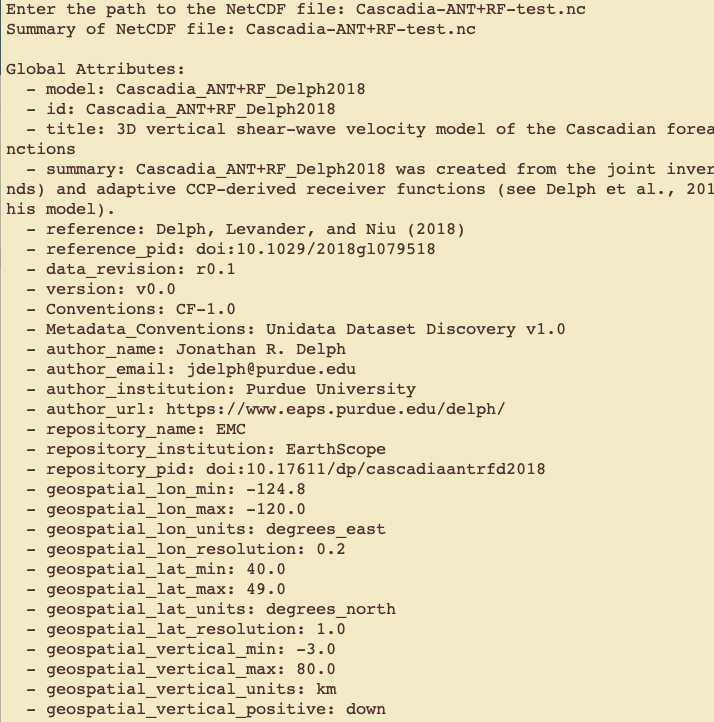
Summary of the netCDF file content.
Step 8: Validate the netCDF File Metadata
To examine the netCDF file content, use the cvm_inspector.py tool to check the metadata, dimensions, coordinates, and variables of a netCDF file. The tool provides a comprehensive inspection of the file and ensures compliance with the CF convention (see cvm_inspector tool).
The tool will prompt you to input the netCDF file path to check:
 ../../src/cvm_inspector.py
 Please enter the file name:
Enter the file name and the inspector start checking the file’s metadata.
Please enter the file name: Cascadia-ANT+RF-test.nc
Step 9: Visualize Your New netCDF to Ensure the Proper File Conversion
By going through this tutorial, we have created a netCDF file (Cascadia-ANT+RF-test.nc) from the Cascadia_ANT+RF_Delph2018 model’s raw data. Use the cvm_slicer tool to view the content of this file and extract data from it to ensure it is properly converted from your original data files.